블로그를 보다보면 스크롤을 내림에 따라 목차가 따라오는 플로팅 목차를 보신 적이 있으실텐데요.
이를 TOC(Table Of Contents)라 합니다.
오늘은 TOC를 만들어 보려합니다.
TOC란 Table Of Contents의 약자로, 작성한 글의 태그에 따라 목차를 생성하여 보여줍니다.
tocbot을 활용해 만들어 보았습니다.
https://tscanlin.github.io/tocbot/
Tocbot
Tocbot builds a table of contents (TOC) from headings in an HTML document. This is useful for documentation websites or long markdown pages because it makes them easier to navigate. This library was inspired by Tocify, the main difference is that Tocbot us
tscanlin.github.io
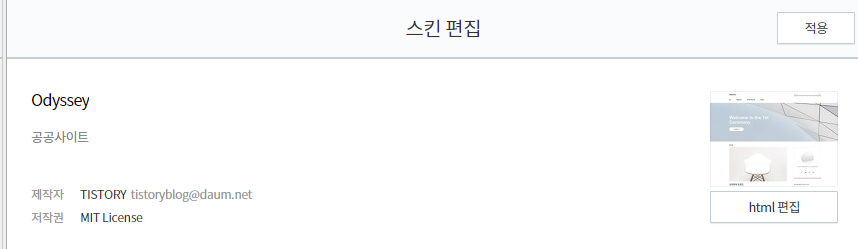
1. 블로그 관리 -> 스킨설정 -> HTML 편집
2. tocbot 불러오기
tocbot의 css와 script를 불러오기 위해 해당 코드를 html의 <head>태그에 아래와 같이 삽입해줍니다.

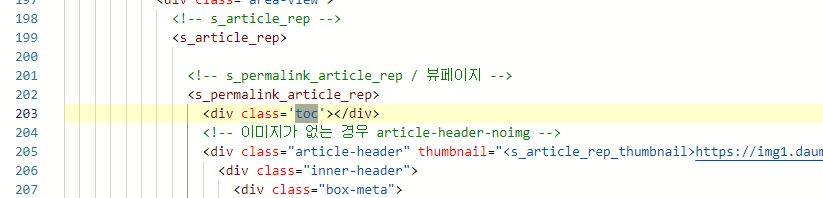
3. body에 toc 넣기
body 본문이 시작되는 지점에 toc div를 삽입해줍니다.
제 경우 <s_permalink_article_rep> 태그 밑에 삽입하였습니다.
티스토리 스킨에 따라 태그가 다를 수 있습니다. 이 경우 개발자 도구(F12)를 통해 body의 클래스명을 확인한 뒤 삽입하면 될 것 같습니다.
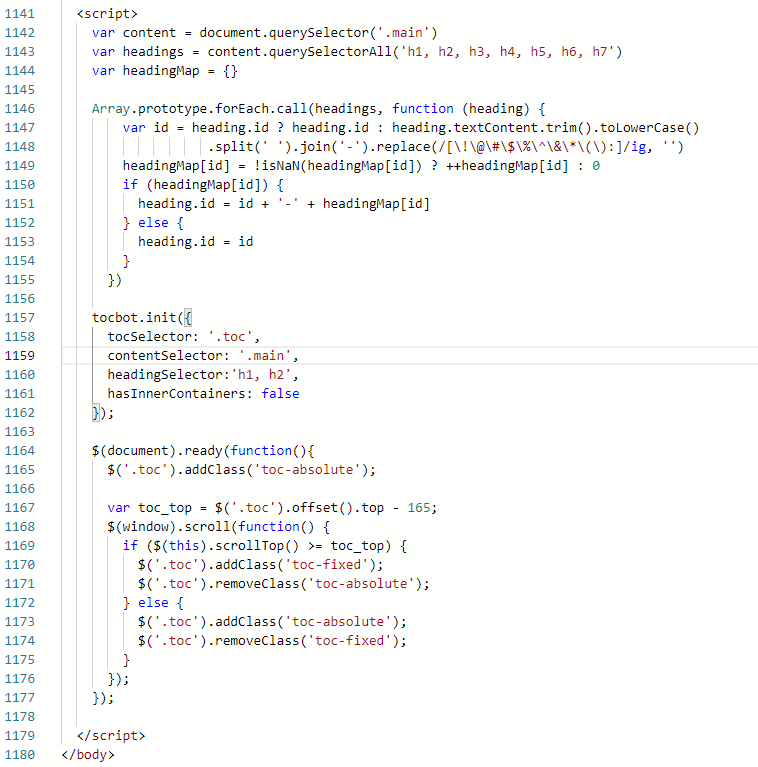
4. Script 작성
html의 body 태그가 끝나는 지점 앞에 script를 넣어줍니다.
이때 아래 사진의 1142, 1159번 줄의 (' ') 안에는 본인 스킨에 맞는 클래스명이 들어가야 합니다.
그러기 위해서 우선 이전과 마찬가지로 개발자 도구(F12)의 검색기능(왼쪽 끝)을 통해 블로그에 들어갈 공간의 클래스명을 찾아줍니다.
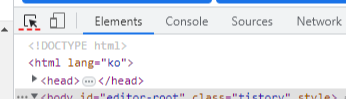
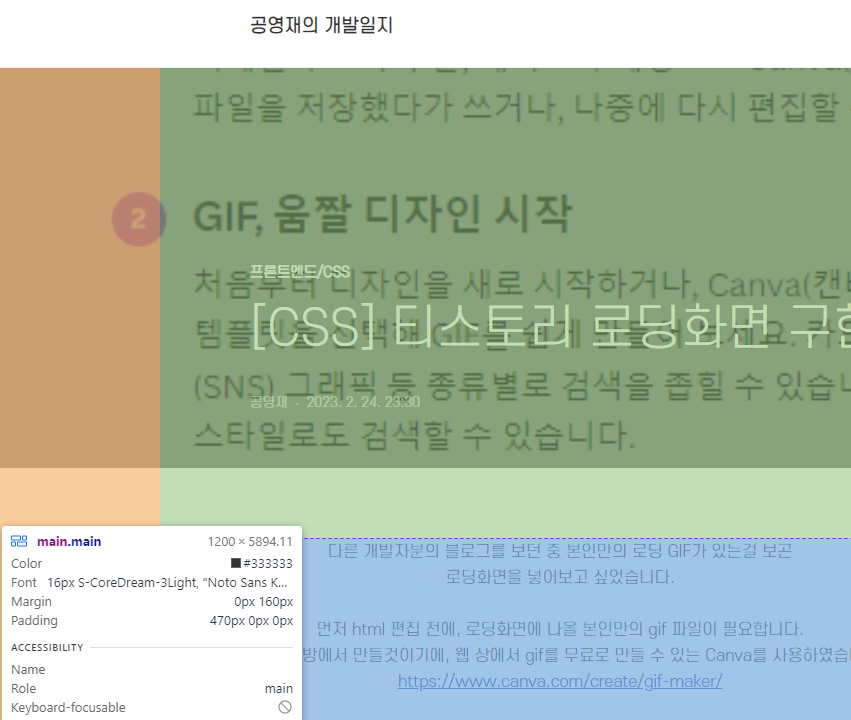
저는 아래와 같이 주황색 공간에 TOC를 넣으려 합니다. 이때의 클래스명을 찾아주시면 됩니다.
아래 이미지에서 보시듯이 제 스킨의 경우 main이 되겠습니다.
클래스명을 찾았으면 이제 html의 </body>태그가 끝나는 부분 앞에 script를 넣어줍니다.
'.main'이라 표시되어있는 부분은 지우고 본인 스킨의 클래스명을 넣어주시면 됩니다.
<!-- TOC HTML -->

  <script>
    var content = document.querySelector('.main')
    var headings = content.querySelectorAll('h1, h2, h3, h4, h5, h6, h7')
    var headingMap = {}

    Array.prototype.forEach.call(headings, function (heading) {
        var id = heading.id ? heading.id : heading.textContent.trim().toLowerCase()
                   .split(' ').join('-').replace(/[\!\@\#\$\%\^\&\*\(\):]/ig, '')
        headingMap[id] = !isNaN(headingMap[id]) ? ++headingMap[id] : 0
        if (headingMap[id]) {
          heading.id = id + '-' + headingMap[id]
        } else {
          heading.id = id
        }
      })

    tocbot.init({
      tocSelector: '.toc',
      contentSelector: '.main',
      headingSelector:'h1, h2',
      hasInnerContainers: false
    });

    $(document).ready(function(){
      $('.toc').addClass('toc-absolute');

      var toc_top = $('.toc').offset().top - 165;
      $(window).scroll(function() {
        if ($(this).scrollTop() >= toc_top) {
          $('.toc').addClass('toc-fixed');
          $('.toc').removeClass('toc-absolute');
        } else {
          $('.toc').addClass('toc-absolute');
          $('.toc').removeClass('toc-fixed');
        }
      });
    });

  </script>

  <!-- TOC HTML -->
제 경우 h1, h2만 목차로 나타내고자 했습니다.
h2는 제목1 에 해당하고, 오름차순으로 제목2, 제목3..입니다. 원하는 대로 바꾸시면 될 것 같습니다.
5. CSS 작성
tocbot을 쓰는데 필요한 css도 작성해줍니다.
아래 코드를 css의 원하는 부분에 넣어주시면 됩니다.
이때 padding, margin 등 기타 조건등을 본인의 스킨에 맞게 커스터마이징하면 됩니다.
  <!-- TOC CSS -->

  .toc-absolute {
    position: absolute;
    margin-top:165px;
  }
  .toc-fixed {
    position: fixed;
    top: 165px;
  }

  .toc {
    left: calc((100% - 850px) / 2 - 300px);
    width: 250px;
    padding: 10px;
    box-sizing: border-box;
  }

  .toc-list {
    margin-top: 10px !important;
    font-size: 0.9em;
  }

  .toc > .toc-list li {
    margin-bottom: 10px;
  }

  .toc > .toc-list li:last-child {
    margin-bottom: 0;
  }

  .toc > .toc-list li a {
    text-decoration: none;
  }

    <!-- TOC CSS -->
아래와 같이 성공적으로 플로팅 목차가 생긴것을 확인할 수 있습니다.
'프론트엔드 > CSS' 카테고리의 다른 글
| [CSS] 티스토리 로딩화면 구현 (0) | 2023.02.24 |
|---|---|
| [CSS] 티스토리 블로그 꾸미기 - 썸네일 애니메이션 (0) | 2022.08.07 |